Don't Worry It's ZZ
- PLANTSMART
- Dec 7, 2022
- 4 min read
Updated: Dec 27, 2022

Repotting your plant is nothing to fear; it's actually quite ZZ. If you need clarification on the indicators that your plant is ready to size up, read on for tips and tricks that will make you a pro at repotting in no time.
"ZZ plants grow slowly, so only need to be repotted every two to three years. Repot into a new container with good drainage that's only 1 to 2 inches larger in diameter. Only repot during the ZZ plant's active growing season in spring or early summer".
Petal Republic
YES, WE KNOW, BUT...
For this repotting article, we will use Zamioculcas Zamiifolia (5" to a 6" pot), also known as the Zanzibar gem or Zuzu plant. While yes, this plant is typically repotted in the Spring or Summer (to encourage growth).
However, we want to focus on ensuring the survival of your plants through the cold season. Waiting until Spring or Summer might be your little green buddy's nail in the coffin. For your houseplant to continue, you must repot, so your green friend can live on!
WHAT TO LOOK FOR
Below we've curated a list of solid indicators that your plant may need to be repotted;
Above The Pot
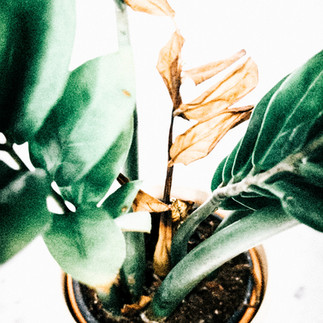
The plant is starting to look stressed out.
It isn't holding enough water.
Has browning or droopy leaves.
If roots are protruding through the top of the soil.
(If you see more roots than dirt, that is an excellent indicator that it's time to bump that plant into a larger pot so that the roots have more soil to interact with).
Below The Pot

Roots are escaping out of the drainage holes on the bottom.
The grower pot has become warped or is cracking.
Roots have become soft or emit odor.
Roots have become pot-bound (where the roots encircle the entirety of the container it's in).

Root-bound or Pot-bound:
When your plant's growth exceeds its container, left for a long time, it can
become pot or root-bound. The roots then form a dense mat or circle the container. A ZZ's foliage, in particular, relies on the growth of its roots; without any room, this plant begins to suffer or wither.
Other Scenarios
Disease or pest infestation.
The plant has soil-related issues; mold, root rot, or fungus gnats.
Don't worry a little TLC and fresh potting soil will return your plant to its spiffy old self in no time.
WHAT'S NEXT?
If you're wondering, "Okay, so I know what to look for, how do I do this thing?" You've guessed it; keep reading to get your plant-tastic buddy looking their best.
WHAT YOU'LL NEED

Potting Soil (The cool thing about this is it can be any well-draining soil. ZZ's are not really picky. If you only have access to moist soil, adding perlite or sand can help with drainage)
Next Size Grower Pot (Note: Maybe suggest where they could buy or find something similar if they are unfamiliar?)
Gloves (Optional, also to minimize mess, but if ya like to stick your hands in the dirt, that's cool, go for it)
Garden Scissors/Shears/Whatever Cuts
Gardening Mat (Optional, but reduces the amount of mess you clean up)
Garden Trowel (Sometimes not needed if your plant lifts right out of the grower pot, but can come in hand loosening those roots)
THE STEPS
STEP 1
Gather your supplies (if you don't have these supplies); most home improvement stores carry these supplies. The only thing you may need to grab separately is the grower pot.

STEP 2
Start by observing the roots; if they protrude from the bottom, clip them, this makes removing the plant from the grower pot easier. If the roots are warping the grower pot and pushing up against the sides, you may have to cut the side of the grower pot to free your ZZ plant.

STEP 3
Once your plant is released from its grower pot, loosen the dirt to expose the roots. If you notice that the roots are bound, make snips and cuts to its roots and give it some wiggle room (this is especially if you notice coiled or matted roots).

- If roots are roots bound, loosen them with snips -
STEP 4
Now it's time to size up; grab that grower pot (one to two sizes larger). Fill in a generous amount of the grower pot with your soil (well-draining soil, of course, add perlite if your soil is too moisture retaining). Make sure to leave enough room for your plant buddy. Also, ensure the rhizomes are above the dirt level as well.

STEP 5
Fill in the empty gaps and sides with more soil, plop that baby in that beautiful pot you've wanted to use, find desired place in the house and stylize accordingly to you.
NOW THAT'S A BEAUTY!

You did it; you have a healthy, brand-new-looking plant to show off (no one will even know it was dying...it'll be our secret). Now that you have all the tips and tools to replant your ZZ, you can apply these steps to most of your houseplant friends. Repotting ensures the longevity and health of your plants; you, too, could be the plant envy of your neighborhood.
SOURCES
Evans, Linsay. “When and How to Repot a ZZ Plant (Essential Guide).” Petal Republic, 12 Nov. 2022, https://www.petalrepublic.com/how-to-repot-zz-plants/.
Langton, Caro, et al. Root, Nurture, Grow: The Essential Guide to Propagating and Sharing Houseplants. Quadrille, an Imprint of Hardie Grant Publishing, 2018.
Sears, Cori. “How to Grow ZZ Plant (Zanzibar Gem) Indoors.” The Spruce, The Spruce, 28 July 2022, https://www.thespruce.com/zz-zanzibar-gem-plant-profile-4796783.


Comments